No edit summary |
Tag: Source edit |
||
| (46 intermediate revisions by 29 users not shown) | |||
| Line 1: | Line 1: | ||
| + | {{Mission2Operation|Battle of Sudentor}} |
||
| − | [[File:Untitled1.png|thumb|259px|right]]"Aces" is the name given to the final mission in Ace Combat 5: The Unsung War. The mission is set after Pops discovers the secret behind the disk the "Major" brought with her. |
||
| + | {{Mission |
||
| + | | image = [[File:ACES intro cutscene.png]] |
||
| + | | game = ''[[Ace Combat 5: The Unsung War]]'' |
||
| + | | mission = [[Campaign]] Mission 27 |
||
| + | | previous = [[Sea of Chaos]] |
||
| + | | next = [[The Unsung War (mission)|The Unsung War]] |
||
| + | | focus = Air-to-Ground |
||
| + | | objective = Destroy all TGTs. |
||
| + | | timelimit = 20 minutes |
||
| + | | playerchar = [[Blaze]] |
||
| + | | u1focus = [[Tunnel flight]] |
||
| + | | u1objective = Destroy the SOLG control system. |
||
| + | | u1timelimit = 20 minutes |
||
| + | }} |
||
| + | {{Quote|This is just insane, from start to finish!|[[Hans Grimm]]}} |
||
| + | '''ACES''' is the 28th and penultimate [[campaign]] mission of ''[[Ace Combat 5: The Unsung War]]'', but is listed as Mission 27 in the game. The [[Kestrel Fleet|''Kestrel'' Fleet]] discovered the [[Grey Men]]'s ultimate plans, and launched [[Razgriz Squadron]] to destroy the [[Strategic Orbital Linear Gun]]'s control devices in [[Sudentor]], [[North Osea]]. |
||
| + | ==Briefing== |
||
| + | ''"We've decoded the disc that the "Major" brought back with her. It contained the blueprints for a "Mass Retaliation Weapon," code name "V2," a far more powerful weapon than the two tactical nukes that the Belkans used in the last war. It was never fully developed at the time, but it appears that they've secretly completed its construction in the 15 years since the war. The V2 is a MIRV missile...it could wipe out half of all the large cities in either Osea or Yuktobania. So where would they deploy it? It had to be in the SOLG, which was also secretly completed and is now operational. After all, it was built to function as an orbital platform for such weapons in the first place. The SOLG itself is unmanned--we know it's controlled from the ground, but we didn't know where. Then, the intelligence vessel Andromeda tracked down the origin of "Schenze's" transmissions to the Arkbird. It's in the former South Belka, a state entrusted to Osean rule and now called North Osea. To be more precise, the transmissions originated from an experimental facility owned by [[Gründer Industries]], the manufacturer of the weapons we use. [[Solare Ostberg|The president of Gründer]] has sworn allegiance to Osea, but in truth, he was a secret member of the "Grey Men." Under the guise of their "experimental facility," they are actually digging a gigantic tunnel under the mountain range that runs along the border dividing North and South Belka. Their ultimate goal is to reunite the two Belkas. And in that tunnel..."'' |
||
| + | (an explosion cancels the briefing) |
||
| − | It is revealed that the "Grey Men" have secured the long-lost Belkan V2, and are planning to use it to take out half of all the large cities in either Osea or Yuktobania. If so, it could cause major destruction on either country. Apparently, the "Grey Men" have put the V2 aboard the SOLG, where they plan to deploy it. It is also discovered that the SOLG is being controlled in a facility under Sudentor, an "experimental facility". In the facility, is actually a tunnel, which leads to the frozen wastelands of Belka. What is in the tunnel, however, is not found out yet, as it turns out that an enemy submarine is attacking the OFS Kestrel, which interrupts with the mission breifieng. After an emergency take-off, (which is followed by the destruction of the Kestrel) the player starts heading to Sudentor with his squad. |
||
| + | ''"The Kestrel just took a missile hit! Enemy unknown. We can't identify it in time! Additional missile approaching! Razgriz, launch immediately and gain altitude to escape!"'' |
||
| − | While the player is heading to Sudentor, [[President Vincent Harling]] gives a speech with [[Prime Minister Nikanor]], a speech which he uses to end the war and promote peace. He succeeds with most forces, but a few warmongers still remain. |
||
| + | ==Hangar Speech== |
||
| + | ''"This'll probably be the last time this ship launches an aircraft, so go ahead and pick the best plane we got in here. Pick whatever you want, we'll catapult it into the sky. We're going to get you up there no matter what. All right?"'' |
||
| + | ==Objectives== |
||
| − | As you arrive in Sudentor, your squad starts singing ''The'' ''Journey Home ''song. Suddenly, a Yuktobanian squad appears. Rather than attack you, the squad of fighter ''joins ''you instead. Another squad soon follows the same lines. Soon a huge group of fighters have joined you, all singing ''The Journey Home''. |
||
| + | ===Initial=== |
||
| + | {{quote|We will attack the SOLG control system, located in a giant tunnel under the Waldreich Mountains. The tunnel entrance is located at the foot of the mountains and the entire area is covered by mountains and waterways. First, an armored force will try to move in from the town to infiltrate the wharf where the entrance to the control system is located. There are several enemy defense positions built along the path that the armored force will take, so air support will be vital for their invasion. Meanwhile, a helicopter formation will attack the control system entrance and capture the nearby area. We're also expecting the helicopters to face anti-air resistance, so we'll need to support to put down enemy fire around the entrance. Your squadron's mission is to protect the armored force and clear out a landing area for the heliborne fleet. Once both units capture the facility entrance, a special forces team will open up the shutter blocking the way inside. Go through the open entrance and destroy the SOLG control system from the inside.|In-flight briefing}} |
||
| + | At the start of the mission, the player will be joined by many new allies on the flight to Sudentor. Upon arriving at the facility, the player must destroy all opposing forces to allow friendly helicopter and tank units to capture the facility. Pillboxes, gun towers, tanks, and one SAM are all marked as TGT and must be destroyed. Optional enemies are also present, including many enemy aircraft. |
||
| + | Partway through the mission, [[Allen C. Hamilton]] will enter the airspace as a named ace. He cannot be shot down; if the player damages his aircraft enough, he will be out of the battle until the Mission Update. |
||
| − | Finally, your squad arrives at Sudentor. In an in-flight breifing, Pops tells you that you must assist the ground forces by attacking the warmongers fortificated in Sudentor. After defeating them, the infantry team manages to get past and take over the facility, opening the tunnel. In another in-flight breifing it is shown that the player must fly inside the tunnel and take out the core. |
||
| + | ===Mission Update=== |
||
| − | Once the player enters, it is revealed that Jack Bartlett will be flying head-on to the player in order to destroy the second core. Hamilton is also seen pursuing the player. Once the player reaches and destroys the core, he or she flies in a branch of the tunnel, awaiting Captain Bartlett. Once Bartlett arrives, the player must ''fly sideways in the tunnel ''in order to avoid crashing into Bartlett. If the player survives this far, he or she must then exit the tunnel ASAP, with enemy fighters flying headfirst into you. If not done quick enough, the player will smash into the closing hatches. If not though, the ending cutscene is seen with the team flying out of the tunnel in the last second. When Nagase asks where [[Hamilton]] is, Grimn answers with "He's dead, hit by a ricocheting plane". |
||
| + | {{quote|We've come across the blueprint of the tunnel facility on the Major's disc. The SOLG control system is in the deepest part of the tunnel. We can't touch it from the entrance. Fly into the tunnel, attack the control system in the deepest part of the complex and escape out the tunnel exit on the opposite side. This is extremely dangerous, but there is no other way to do this. There are two central components to the control system. You must destroy them both, but you can only destroy one of them per attack run. Furthermore, the ground forces will not be able to keep the entrance shutters open for very long. There is not enough time for you to go back into the tunnel again after the first run. So, a separate plane will have to go in from the other side at the same time. We have only one chance. Synchronize your run with the second plane to attack both components simultaneously and destroy the SOLG control system.|In-flight briefing}} |
||
| − | [[Category:Ace Combat 5 Missions]] |
||
| + | After all forces capture the facility and begin opening the tunnel entrance, an in-flight briefing will explain that the tunnel is many miles long and the player must fly through it and escape on the other side, destroying one of the SOLG's control cores along the way. Hamilton will chase down the player and fire on them if they fly too slow, but the tunnel has many turns as well as obstacles along the way, including the opening shutters. |
||
| + | |||
| + | After the player destroys the SOLG control core, they must survive a head-on pass with Bartlett (who came in from the other side to destroy the other core) and escape the tunnel. The shutters will begin to close, and along with more obstacles as well as Hamilton from behind, enemy planes will appear in front of the player and fire on them. |
||
| + | |||
| + | The mission is successful when the player escapes the tunnel. |
||
| + | |||
| + | ==Enemy Lists== |
||
| + | The following enemy lists are taken from the ''[[Ace Combat 5: The Unsung War Perfect Guide]]''.{{Ref|AC5-TPG-133|''[[Ace Combat 5: The Unsung War Perfect Guide]]'', page 133.}} |
||
| + | ===Standard Units=== |
||
| + | {| class="wikitable" style="width:100%;text-align:center;" |
||
| + | ! style="width:100px;" | Section |
||
| + | ! style="width:40px;" | |
||
| + | ! style="width:200px;" | Unit |
||
| + | ! style="width:50px;" | Points |
||
| + | ! style="width:30px;" | Count |
||
| + | ! Notes |
||
| + | |- |
||
| + | ! rowspan="14" style="vertical-align:top;" | Initial |
||
| + | | [[File:Icon-AirEnemy.svg|20px]] |
||
| + | | [[Su-27 Flanker-B|Su-27]] |
||
| + | | 480 |
||
| + | | 1 |
||
| + | | |
||
| + | |- |
||
| + | | [[File:Icon-AirEnemy.svg|20px]] |
||
| + | | [[Typhoon]] |
||
| + | | 700 |
||
| + | | {{Infinite}} |
||
| + | | |
||
| + | |- |
||
| + | | [[File:Icon-AirEnemy.svg|20px]] |
||
| + | | [[F-22A Raptor|F/A-22A]] |
||
| + | | 760 |
||
| + | | {{Infinite}} |
||
| + | | |
||
| + | |- |
||
| + | | [[File:Icon-AirEnemy.svg|20px]] |
||
| + | | [[Su-47 Berkut|Su-47]] |
||
| + | | 760 |
||
| + | | {{Infinite}} |
||
| + | | |
||
| + | |- |
||
| + | | [[File:Icon-AirEnemy.svg|20px]] |
||
| + | | [[MiG-1.44 Flatpack|MiG-1.44 "HAMILTON"]] |
||
| + | | 760 |
||
| + | | 1 |
||
| + | | {{Note|Hamilton cannot be completely shot down, but the player will still get the points for damaging his aircraft to a certain point. In the ACES tunnel, Hamilton is invincible.}} |
||
| + | |- |
||
| + | | [[File:Icon-GroundTGT.svg|20px]] |
||
| + | | [[Surface-to-Air Missile|SAM]] |
||
| + | | 120 |
||
| + | | 1 |
||
| + | | |
||
| + | |- |
||
| + | | [[File:Icon-GroundTGT.svg|20px]] |
||
| + | | [[Tank|TANK]] |
||
| + | | 150 |
||
| + | | 5 |
||
| + | | |
||
| + | |- |
||
| + | | [[File:Icon-GroundTGT.svg|20px]] |
||
| + | | [[Gun tower|GUN TOWER]] |
||
| + | | 200 |
||
| + | | 6 |
||
| + | | |
||
| + | |- |
||
| + | | [[File:Icon-GroundTGT.svg|20px]] |
||
| + | | [[Pillbox|PILLBOX]] |
||
| + | | 250 |
||
| + | | 3 |
||
| + | | |
||
| + | |- |
||
| + | | [[File:Icon-GroundEnemy.svg|20px]] |
||
| + | | [[Hangar|HANGAR]] |
||
| + | | 1000 |
||
| + | | 1 |
||
| + | | {{Note|This is one of the five special [[ADF-01 FALKEN]] hangars. Destroying this hangar and completing the mission will help the player progress towards unlocking the FALKEN.}} |
||
| + | |- |
||
| + | | [[File:Icon-GroundEnemy.svg|20px]] |
||
| + | | [[Sea Shadow|DESTROYER]] |
||
| + | | 1100 |
||
| + | | 1 |
||
| + | | |
||
| + | |- |
||
| + | | [[File:Icon-GroundEnemy.svg|20px]] |
||
| + | | STORAGE |
||
| + | | 80 |
||
| + | | 2 |
||
| + | | |
||
| + | |- |
||
| + | | [[File:Icon-GroundEnemy.svg|20px]] |
||
| + | | [[Oil tank|OIL TANK]] |
||
| + | | 110 |
||
| + | | 2 |
||
| + | | |
||
| + | |- |
||
| + | | [[File:Icon-GroundEnemy.svg|20px]] |
||
| + | | [[Crane|CRANE]] |
||
| + | | 160 |
||
| + | | 1 |
||
| + | | |
||
| + | |- |
||
| + | ! rowspan="2" style="vertical-align:top;" | Mission Update |
||
| + | | [[File:Icon-AirEnemy.svg|20px]] |
||
| + | | [[Su-47 Berkut|Su-47]] |
||
| + | | 760 |
||
| + | | 3 |
||
| + | | |
||
| + | |- |
||
| + | | [[File:Icon-GroundTGT.svg|20px]] |
||
| + | | CORE |
||
| + | | 2000 |
||
| + | | 1 |
||
| + | | |
||
| + | |} |
||
| + | |||
| + | ===Special Units=== |
||
| + | {{Main|Ace Combat 5: The Unsung War/Aces}} |
||
| + | The following unit only shows up after the player completes the campaign at least once. It will appear on Normal difficulty in both campaign and [[Free Mission]]. |
||
| + | {| class="wikitable" style="width:100%;text-align:center;" |
||
| + | ! style="width:40px;" | |
||
| + | ! style="width:200px;" | Unit |
||
| + | ! style="width:50px;" | Points |
||
| + | ! Notes |
||
| + | |- |
||
| + | | [[File:Icon-AirEnemy.svg|20px]] |
||
| + | | [[Su-37 Terminator|Su-37 "YELLOW"]] |
||
| + | | 1800 |
||
| + | | {{Note|YELLOW is protected between two Su-47s. Even if the player locks on to YELLOW, their standard missiles will hit the Su-47 in front or behind it. The player must use multi-lock missiles such as the XMAA or XLAA to shoot down YELLOW, or else use a combination of special weapons and standard missiles to destroy both Su-47s and then YELLOW.}} |
||
| + | |} |
||
| + | |||
| + | ==S Rank== |
||
| + | Earning an [[Clear Ranks|S rank]] on this mission requires earning 15,000 points.{{Ref|AC5-TPG-132|''[[Ace Combat 5: The Unsung War Perfect Guide]]'', page 132.}} Without including the enemy planes in the tunnel, the player should earn at least 13,000 points before entering the tunnel since the CORE awards 2,000 points. The only way to accomplish this is shooting down the aircraft that have infinite respawns—the Typhoons, F/A-22s, and Su-47s—before entering the tunnel. |
||
| + | ==Debriefing== |
||
| + | ''--Emergency transmission from Central.'' |
||
| + | |||
| + | ''STORM AND LIGHTNING CEASED''<br> |
||
| + | ''STAR CONFIRMED SILENCED'' |
||
| + | ==Gallery== |
||
| + | <gallery> |
||
| + | Razgriz squadron exiting Sudentor tunnel.png|Razgriz Squadron exiting Sudentor tunnel |
||
| + | </gallery> |
||
| + | ==Trivia== |
||
| + | * One of five special hangars housing parts for the [[ADF-01 FALKEN]] can be found in this mission. It's located among the other facilities directly north of the player's spawn point, and appears after the initial briefing by Pops. |
||
| + | *A glitch is present in this mission that allows the player to complete the mission without doing the latter half of the tunnel flight: |
||
| + | *#After the tunnel entrance opens, do not go inside. Instead, fly due north towards the tunnel exit. The SOLG will continue to fire, but will not damage the player. |
||
| + | *#After the environment changes to snowy with a blue fog, locate the tunnel exit and fly very close to it, but do not fly inside. The trigger will be activated when Bartlett says: "I'll be passing you by head-on at full speed, all right? Break right on the count of three." |
||
| + | *#Fly back to Sudentor and fly inside the tunnel entrance, continuing the mission normally. |
||
| + | *#Upon destroying the SOLG control core, the mission will be automatically completed. (However, this will not work in the PS4 port of the game). |
||
| + | *If the player tries to perform a U-turn in the tunnel before passing by Bartlett, they will crash into the tunnel entrance, which closed behind them. Interestingly, Hamilton—who the player would have already passed when making their U-turn—will reappear behind the closed shutter and fire on the player through it.{{Ref|ACESEntranceClosed|2=[https://www.youtube.com/watch?v=MhccFKaPEqI What if you do a U-Turn inside the ACES tunnel?]. YouTube. Uploaded by [[User:ASF-X Shinden II]] on August 7, 2017.}} |
||
| + | **The entrance closing behind the player creates the possibility that Bartlett could not escape the tunnel and crashed into it. However, Bartlett's actual fate is left ambiguous in the game, since the player is not supposed to make a U-turn and return to the entrance. |
||
| + | *Instead of staying to support the player, the friendly fighters all exit the combat area after their introduction. |
||
| + | *A building with the words "Namco Hometek" on it is located southwest of the tunnel entrance in Sudentor. |
||
| + | *A glitch with collision detection allows the player to destroy Hamilton's aircraft. The easiest way to do this is attack Hamilton as he is coming at the player head on with a salvo of 2 [[Quick Maneuver Air-to-Air Missile|QAAM]]s. If they hit simultaneously Hamilton's aircraft will catch fire and explode like a normal enemy aircraft and the player will be credited for shooting him down twice. This does not effect his reappearance in the tunnel. |
||
| + | {{Notelist}} |
||
| + | {{Reflist}} |
||
| + | {{Navbox/AC5-Missions}} |
||
| + | [[zh:ACES]] |
||
Latest revision as of 03:54, 30 November 2022
- "This is just insane, from start to finish!"
- ― Hans Grimm
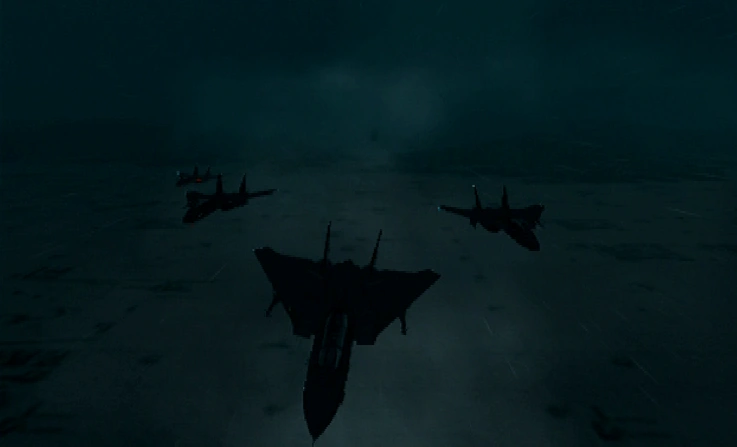
ACES is the 28th and penultimate campaign mission of Ace Combat 5: The Unsung War, but is listed as Mission 27 in the game. The Kestrel Fleet discovered the Grey Men's ultimate plans, and launched Razgriz Squadron to destroy the Strategic Orbital Linear Gun's control devices in Sudentor, North Osea.
Briefing
"We've decoded the disc that the "Major" brought back with her. It contained the blueprints for a "Mass Retaliation Weapon," code name "V2," a far more powerful weapon than the two tactical nukes that the Belkans used in the last war. It was never fully developed at the time, but it appears that they've secretly completed its construction in the 15 years since the war. The V2 is a MIRV missile...it could wipe out half of all the large cities in either Osea or Yuktobania. So where would they deploy it? It had to be in the SOLG, which was also secretly completed and is now operational. After all, it was built to function as an orbital platform for such weapons in the first place. The SOLG itself is unmanned--we know it's controlled from the ground, but we didn't know where. Then, the intelligence vessel Andromeda tracked down the origin of "Schenze's" transmissions to the Arkbird. It's in the former South Belka, a state entrusted to Osean rule and now called North Osea. To be more precise, the transmissions originated from an experimental facility owned by Gründer Industries, the manufacturer of the weapons we use. The president of Gründer has sworn allegiance to Osea, but in truth, he was a secret member of the "Grey Men." Under the guise of their "experimental facility," they are actually digging a gigantic tunnel under the mountain range that runs along the border dividing North and South Belka. Their ultimate goal is to reunite the two Belkas. And in that tunnel..."
(an explosion cancels the briefing)
"The Kestrel just took a missile hit! Enemy unknown. We can't identify it in time! Additional missile approaching! Razgriz, launch immediately and gain altitude to escape!"
Hangar Speech
"This'll probably be the last time this ship launches an aircraft, so go ahead and pick the best plane we got in here. Pick whatever you want, we'll catapult it into the sky. We're going to get you up there no matter what. All right?"
Objectives
Initial
- "We will attack the SOLG control system, located in a giant tunnel under the Waldreich Mountains. The tunnel entrance is located at the foot of the mountains and the entire area is covered by mountains and waterways. First, an armored force will try to move in from the town to infiltrate the wharf where the entrance to the control system is located. There are several enemy defense positions built along the path that the armored force will take, so air support will be vital for their invasion. Meanwhile, a helicopter formation will attack the control system entrance and capture the nearby area. We're also expecting the helicopters to face anti-air resistance, so we'll need to support to put down enemy fire around the entrance. Your squadron's mission is to protect the armored force and clear out a landing area for the heliborne fleet. Once both units capture the facility entrance, a special forces team will open up the shutter blocking the way inside. Go through the open entrance and destroy the SOLG control system from the inside."
- ― In-flight briefing
At the start of the mission, the player will be joined by many new allies on the flight to Sudentor. Upon arriving at the facility, the player must destroy all opposing forces to allow friendly helicopter and tank units to capture the facility. Pillboxes, gun towers, tanks, and one SAM are all marked as TGT and must be destroyed. Optional enemies are also present, including many enemy aircraft.
Partway through the mission, Allen C. Hamilton will enter the airspace as a named ace. He cannot be shot down; if the player damages his aircraft enough, he will be out of the battle until the Mission Update.
Mission Update
- "We've come across the blueprint of the tunnel facility on the Major's disc. The SOLG control system is in the deepest part of the tunnel. We can't touch it from the entrance. Fly into the tunnel, attack the control system in the deepest part of the complex and escape out the tunnel exit on the opposite side. This is extremely dangerous, but there is no other way to do this. There are two central components to the control system. You must destroy them both, but you can only destroy one of them per attack run. Furthermore, the ground forces will not be able to keep the entrance shutters open for very long. There is not enough time for you to go back into the tunnel again after the first run. So, a separate plane will have to go in from the other side at the same time. We have only one chance. Synchronize your run with the second plane to attack both components simultaneously and destroy the SOLG control system."
- ― In-flight briefing
After all forces capture the facility and begin opening the tunnel entrance, an in-flight briefing will explain that the tunnel is many miles long and the player must fly through it and escape on the other side, destroying one of the SOLG's control cores along the way. Hamilton will chase down the player and fire on them if they fly too slow, but the tunnel has many turns as well as obstacles along the way, including the opening shutters.
After the player destroys the SOLG control core, they must survive a head-on pass with Bartlett (who came in from the other side to destroy the other core) and escape the tunnel. The shutters will begin to close, and along with more obstacles as well as Hamilton from behind, enemy planes will appear in front of the player and fire on them.
The mission is successful when the player escapes the tunnel.
Enemy Lists
The following enemy lists are taken from the Ace Combat 5: The Unsung War Perfect Guide.[1]
Standard Units
| Section | Unit | Points | Count | Notes | |
|---|---|---|---|---|---|
| Initial | Su-27 | 480 | 1 | ||
| Typhoon | 700 | ∞ | |||
| F/A-22A | 760 | ∞ | |||
| Su-47 | 760 | ∞ | |||
| MiG-1.44 "HAMILTON" | 760 | 1 | [note 1] | ||
| SAM | 120 | 1 | |||
| TANK | 150 | 5 | |||
| GUN TOWER | 200 | 6 | |||
| PILLBOX | 250 | 3 | |||
| HANGAR | 1000 | 1 | [note 2] | ||
| DESTROYER | 1100 | 1 | |||
| STORAGE | 80 | 2 | |||
| OIL TANK | 110 | 2 | |||
| CRANE | 160 | 1 | |||
| Mission Update | Su-47 | 760 | 3 | ||
| CORE | 2000 | 1 |
Special Units
The following unit only shows up after the player completes the campaign at least once. It will appear on Normal difficulty in both campaign and Free Mission.
| Unit | Points | Notes | |
|---|---|---|---|
| Su-37 "YELLOW" | 1800 | [note 3] |
S Rank
Earning an S rank on this mission requires earning 15,000 points.[2] Without including the enemy planes in the tunnel, the player should earn at least 13,000 points before entering the tunnel since the CORE awards 2,000 points. The only way to accomplish this is shooting down the aircraft that have infinite respawns—the Typhoons, F/A-22s, and Su-47s—before entering the tunnel.
Debriefing
--Emergency transmission from Central.
STORM AND LIGHTNING CEASED
STAR CONFIRMED SILENCED
Gallery

Razgriz Squadron exiting Sudentor tunnel
Trivia
- One of five special hangars housing parts for the ADF-01 FALKEN can be found in this mission. It's located among the other facilities directly north of the player's spawn point, and appears after the initial briefing by Pops.
- A glitch is present in this mission that allows the player to complete the mission without doing the latter half of the tunnel flight:
- After the tunnel entrance opens, do not go inside. Instead, fly due north towards the tunnel exit. The SOLG will continue to fire, but will not damage the player.
- After the environment changes to snowy with a blue fog, locate the tunnel exit and fly very close to it, but do not fly inside. The trigger will be activated when Bartlett says: "I'll be passing you by head-on at full speed, all right? Break right on the count of three."
- Fly back to Sudentor and fly inside the tunnel entrance, continuing the mission normally.
- Upon destroying the SOLG control core, the mission will be automatically completed. (However, this will not work in the PS4 port of the game).
- If the player tries to perform a U-turn in the tunnel before passing by Bartlett, they will crash into the tunnel entrance, which closed behind them. Interestingly, Hamilton—who the player would have already passed when making their U-turn—will reappear behind the closed shutter and fire on the player through it.[3]
- The entrance closing behind the player creates the possibility that Bartlett could not escape the tunnel and crashed into it. However, Bartlett's actual fate is left ambiguous in the game, since the player is not supposed to make a U-turn and return to the entrance.
- Instead of staying to support the player, the friendly fighters all exit the combat area after their introduction.
- A building with the words "Namco Hometek" on it is located southwest of the tunnel entrance in Sudentor.
- A glitch with collision detection allows the player to destroy Hamilton's aircraft. The easiest way to do this is attack Hamilton as he is coming at the player head on with a salvo of 2 QAAMs. If they hit simultaneously Hamilton's aircraft will catch fire and explode like a normal enemy aircraft and the player will be credited for shooting him down twice. This does not effect his reappearance in the tunnel.
Footnotes
- ↑ Hamilton cannot be completely shot down, but the player will still get the points for damaging his aircraft to a certain point. In the ACES tunnel, Hamilton is invincible.
- ↑ This is one of the five special ADF-01 FALKEN hangars. Destroying this hangar and completing the mission will help the player progress towards unlocking the FALKEN.
- ↑ YELLOW is protected between two Su-47s. Even if the player locks on to YELLOW, their standard missiles will hit the Su-47 in front or behind it. The player must use multi-lock missiles such as the XMAA or XLAA to shoot down YELLOW, or else use a combination of special weapons and standard missiles to destroy both Su-47s and then YELLOW.
References
- ↑ Ace Combat 5: The Unsung War Perfect Guide, page 133.
- ↑ Ace Combat 5: The Unsung War Perfect Guide, page 132.
- ↑ What if you do a U-Turn inside the ACES tunnel?. YouTube. Uploaded by User:ASF-X Shinden II on August 7, 2017.
| Ace Combat 5: The Unsung War Missions | ||||||||
|---|---|---|---|---|---|---|---|---|
| Campaign |
| |||||||
| Arcade |
| |||||||