m (Tweaked infobox to match other conflict pgs) Tag: rte-source |
m (Forgot to add one break, fix link in infobox) Tag: rte-source |
||
| Line 9: | Line 9: | ||
|following = [[Operation Katina]] |
|following = [[Operation Katina]] |
||
|combatant1 = [[Independent State Allied Forces]] |
|combatant1 = [[Independent State Allied Forces]] |
||
| − | |commander1 = [[AWACS SkyEye]] |
+ | |commander1 = [[AWACS SkyEye]]<br>([[ISAF Air Force]]) |
|casualties1 = Multiple troops, pilots, and civilians |
|casualties1 = Multiple troops, pilots, and civilians |
||
|combatant2 = [[Erusea|Federal Republic of Erusea]] |
|combatant2 = [[Erusea|Federal Republic of Erusea]] |
||
Revision as of 03:12, 11 July 2016
The Second Usean Continental War was a long-lasting war that took place on the Usean continent, between the Independent State Allied Forces (ISAF) and the Federal Republic of Erusea.[1]
Prelude
In 1994, the Ulysses 1994XF04 asteroid was discovered and expected to collide with Earth in 1999. In response, the nations of Usea banded together to create the Stonehenge Turret Network, an advanced railgun network designed to combat the threat of Ulysses. Stonehenge was built south of the city of San Salvacion and engineered to ensure that it could only fire into space towards the asteroid. On July 3, 1999, Ulysses split into multiple fragments on its approach and rained down on the planet. Stonehenge performed as best it could, but a large number of fragments still impacted the surface, causing incredible devastation.[1][2]
In the aftermath of the Ulysses disaster, the nations of Usea, in a coalition known as the Central Usea Treaty Organization (UTO), agreed to each admit a certain quota of civilian refugees who had been displaced by the disaster. However, in April 2003, Erusea refused to accept any more refugees, citing its inability to handle the large influx of people along with the rebuilding efforts within Erusea. Other Usean nations boycotted Erusian exports in protest as displaced refugees began to succumb to disease and starvation along the Erusian borders.[2]
First battles
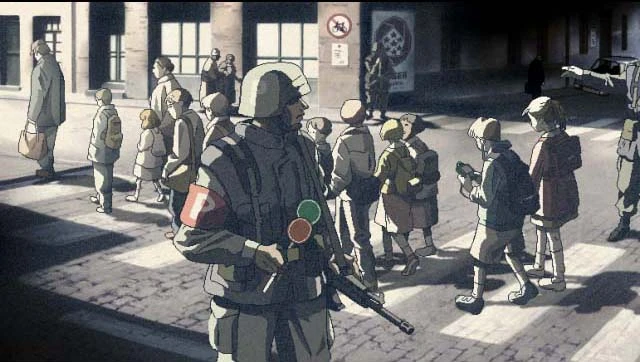
Citizens of San Salvacion walk by an Erusian occupation soldier.
Suddenly, in August 2003, Erusea invaded neighboring San Salvacion and seized control of the Stonehenge Turret Network. The Federation of Central Usea warned Erusea to withdraw its forces by September 14 or face military retaliation. Soon after, rumors began to circulate that Erusea was modifying Stonehenge in some way. In preparation, the countries of the UTO reformed into the Independent State Allied Forces, a military alliance in opposition to the Erusians' brinkmanship.[2]
Erusea then launched a surprise attack on the ISAF forces at their newly-formed GHQ in Istas Fortress utilizing Stonehenge as an anti-aircraft weapon. Caught off-guard and unable to maintain air superiority against the overwhelming firepower of Stonehenge, ISAF was forced to retreat. Soon after, ISAF attempted a daring airborne operation consisting of their finest pilots to destroy Stonehenge, but was thwarted by the Federal Erusea Air Force's infamous 156th Tactical Fighter Wing, better known as Yellow Squadron. After suffering two crushing defeats, ISAF made a full retreat from the Usean mainland and regrouped at its new GHQ at North Point.[2]
On September 19, 2004, after a long period of sporadic fighting, Erusian operatives disabled part of ISAF's early warning radar network, allowing a large bomber force to deploy from Rigley Air Base with the intention of destroying ISAF's North Point GHQ. ISAF scrambled its remaining fighters, including several new pilots, to intercept the bombers before they could hit Allenfort Air Base and move on to targets at North Point. The operation was a success, giving ISAF a temporary breather.[3]
A month later, ISAF GHQ deployed fighters to raid Rigley Air Base, thereby eliminating the threat posed by the remaining Erusian bombers stationed there. The bombers were caught on the ground, and the ISAF fighters successfully completed their mission.[4] ISAF then made preparations to regroup its remaining ground forces at North Point. ISAF fighters were able to knock out the radar facilities atop Mount Shezna and blind the Erusians to ISAF troop movements. With its ground forces rallied, the ISAF began making preparations for a counterattack.[5]
In response to ISAF's string of victories, Erusea deployed its "invincible" Aegir Fleet to destroy ISAF's GHQ at North Point. The fleet's power was immense—far too much for the ISAF to confront directly.[1] However, ISAF command recognized the perfect opportunity to strike the fleet was while it was docked at Comberth Harbor. For this to succeed, ISAF opted to delay and disrupt the fleet's launch by impeding its resupply efforts. ISAF fighters first interdicted the Erusians' aerial supply routes by shooting down transport aircraft bound for Comberth.[6] ISAF then targeted a petrochemical complex supplying the Aegir Fleet with fuel, which was deemed a partial failure due to the arrival of Yellow Squadron, who managed to shoot down several ISAF fighters attempting to flee the airspace.[7] Despite this slight setback, both operations proved successful in crippling the Aegir Fleet, giving ISAF the advantage it desperately needed. The entire Aegir Fleet, deprived of fuel and supplies, was destroyed on November 23, 2004 as it sat immobilized in Comberth Harbor.[8]
A few weeks later, ISAF fighters were able to incapacitate the Erusians' solar-powered generator plants at Faith Park, which supplied approximately 60% of the power for the Erusians' military industrial complexes. This continued success gave ISAF an opportunity to turn the tide of the war in its favor.[9]
ISAF return to the mainland
In preparation for its impending invasion of the Usean mainland, ISAF planned to launch a military reconnaissance satellite (intended to track Erusea's troop movements and determine the best location to counterattack) from Riass Space Center in the Comona Islands. Despite a large-scale air battle over the islands, including a force of Erusian B-2A Spirit bombers as well as Yellow Squadron's reappearance, the satellite was successfully launched.[10]
On January 24, 2005, ISAF commenced Operation Bunker Shot, an amphibious landing operation undertaken by ISAF forces at the Caranda, Halle and Crowne beaches (the only suitable landing location outside Stonehenge's attack range). ISAF ground, sea, and air units were mobilized for this large-scale operation, and, despite numerous casualties, were able to establish a beachhead.[11]
ISAF's next step in reclaiming the mainland was to retake Istas Fortress, the former ISAF GHQ. Despite the difficulty presented by the area's mountainous terrain and intermittent aerial attacks by Stonehenge, ISAF fighters managed to inflict heavy damage to the occupying Erusian forces VTOL facilities, giving the ISAF ground troops an easier fight to take reclaim the fortress. A forward HQ was established to spearhead the push into the mainland, reclaim lost territory, and (eventually) destroy Stonehenge—all with the hopes of bringing about a quick end to the conflict.[12]
Destroying Stonehenge
Soon after the retaking of Istas Fortress, ISAF command was contacted by the engineers responsible for Stonehenge. The scientists, as well as their families, were attempting to defect and requested amnesty in exchange for vital information that would help ISAF destroy Stonehenge. ISAF accepted, and the defectors boarded two civilian airliners (Air Ixiom Flights 701 and 702) bound for ISAF territory. However, Erusea caught wind of the defectors' plans and dispatched fighters to shoot down the civilian planes, choosing not to employ Stonehenge. A sole ISAF fighter, Mobius 1 (one of the pilots who had assisted ISAF's recent victories) was launched to dispatch the Erusians and escort the defectors to safety.[13]
The two flights safely landed in ISAF territory, and the engineers provided crucial information regarding Stonehenge's defenses, including a sophisticated jamming system that prevented missile lock-on and a vast network of anti-aircraft guns and surface-to-air missiles. With this new information in hand, a second assault on Stonehenge was planned.[13][14]
On April 2nd, 2005, ISAF fighters took to the skies and approached Stonehenge's airspace. Air raid sirens sounded in San Salvacion, where Yellow Squadron (assigned to safeguard Stonehenge since the war's opening) had been stationed, and the squadron took off. However, the San Salvacion resistance detonated a bomb on Yellow Squadron's runway earlier that day. Yellow 4 had suffered light shrapnel wounds, and one of her aircraft's engines was damaged. Disregarding her injuries and aircraft's damage, Yellow 4 scrambled with the rest of her squadron.[15]
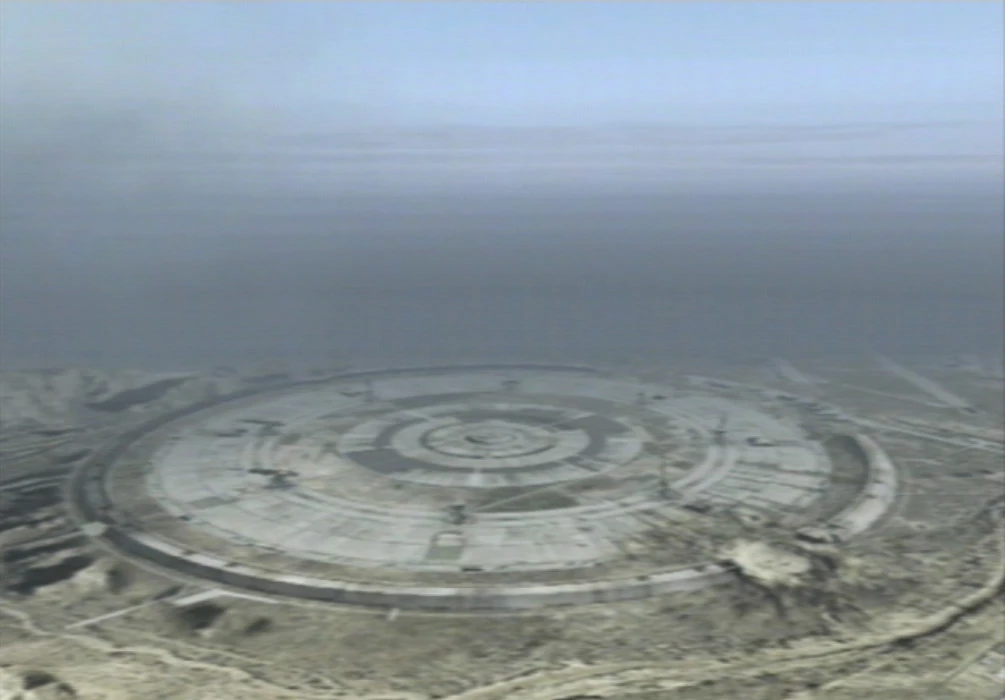
The Stonehenge Turret Network.
As ISAF's fighters approached the operation airspace, Stonehenge opened fire. The fighters managed to slip inside the perimeter of Stonehenge and destroy the jamming facility at its center utilizing their Vulcan machine guns. Following this, while the rest of the ISAF fighters were tangled with defending Erusian fighters and evading volleys from Stonehenge, Mobius 1 single-handedly destroyed the railgun cannons one-by-one, eliminating the threat of Stonehenge once and for all. Yellow Squadron, delayed by the morning's resistance attack, arrived too late to prevent the destruction of Stonehenge, but engaged the ISAF fighters nevertheless. During the engagement, Mobius 1 shot down Yellow 4, forcing the rest of the Yellows to retreat. The operation was a resounding success.[14]
Ending the war
With Stonehenge out of the way, the ISAF began to advance on Erusian positions and slowly push them westward. In May 2005, ISAF launched a spy plane to gather intelligence on Erusian operations. Mobius 1 assisted in the spy plane's safe return through Gnome Ravine (northwest of Los Canas), which provided ISAF with information on another Erusian superweapon under development codenamed Megalith. ISAF command was alarmed; they now realized that the war needed to end much faster in order to prevent this superweapon's deployment.[16]
To secure the northern part of the continent, another ISAF invasion force was deployed, to which Erusea responded by launching cruise missiles at the ISAF's landing areas. Once again, Mobius 1 undertook a solo operation and intercepted all of the cruise missiles, including a single high-yield burst missile. The landing operations were a success, and in short order, the northern part of Usea fell under ISAF control.[17]
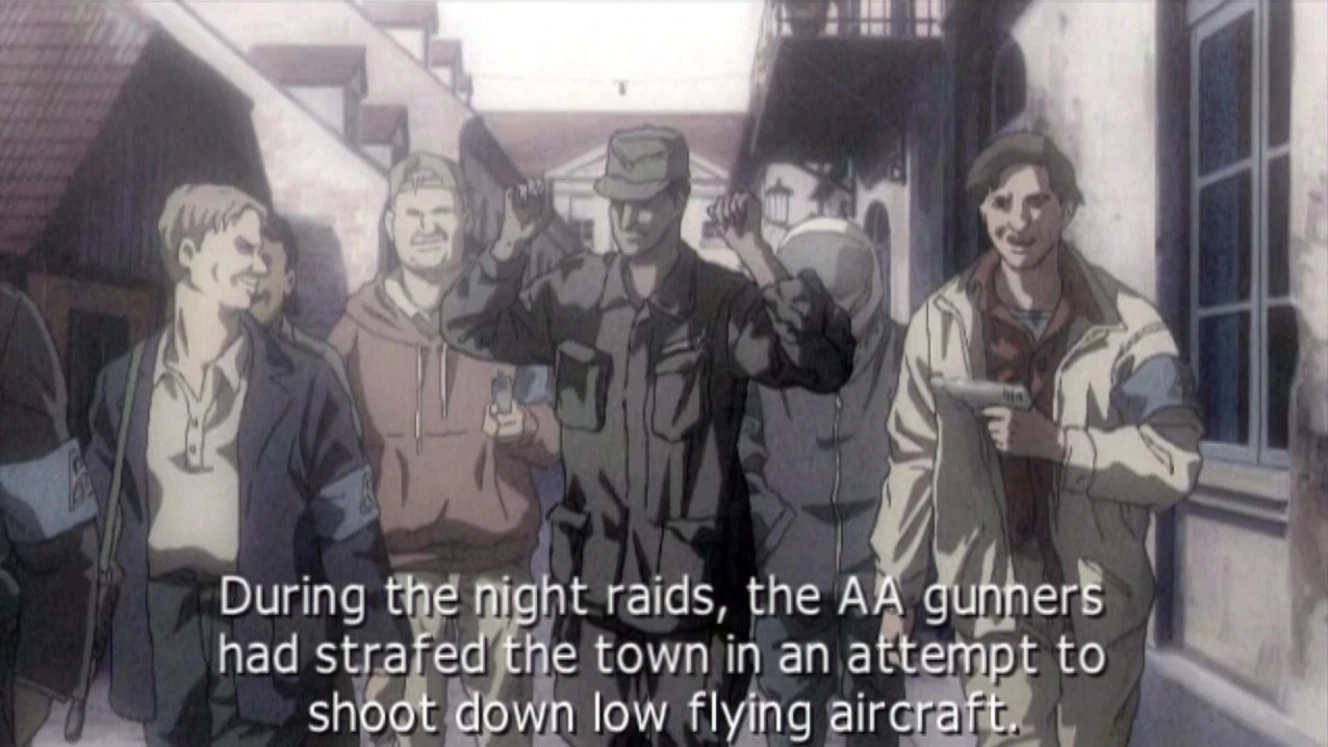
San Salvacion resistance fighters rounding up Erusian soldiers after the city's liberation.
In early July 2005, ISAF made preparations to liberate San Salvacion, which had been under Erusian control for nearly two years. Erusea's occupation forces fought fiercely, refusing to relinquish the city easily. Yellow Squadron was among the Erusian forces stationed in the city, attempting to maintain control for as long as they could. Eventually, with the capture of key areas throughout the city, San Salvacion was liberated and the Erusians were pushed back once again.[18]
Following their expulsion from San Salvacion, the Erusian forces fell back and set up a defense line in the Whiskey Corridor between the Lambert and Amber Mountains; it would be the last line of defense before their capital city, Farbanti. The ground and aerial forces on both sides were numerous, and the operation was prolonged. Gradually, ISAF tank brigades inched forward through the desert sands and flanked Erusea's field HQ. After suffering considerable losses, the Erusians abandoned their position and retreated to Farbanti in preparation for the oncoming invasion.[19]
On September 19, 2005, exactly one year to the day after ISAF's successful defense of North Point, ISAF laid siege to Farbanti. All of ISAF's forces engaged the remainding Erusian forces in key areas throughout the city. With fighters providing close air support, the ISAF ground troops fought their way towards the Erusians' GHQ. Erusea's top military leaders attempted to escape the besieged capital via helicopter before the GHQ could be taken, but were shot down. (ISAF ground units would later find the Erusian Supreme Commander's remains inside one of the helicopters that failed to take off with the others.) As the ISAF forces infiltrated the GHQ, Yellow Squadron appeared once more. Mobius 1 met them alone, shooting down all five Yellows and maintaining ISAF's air superiority over the capital. With the loss of Yellow Squadron and the Supreme Commander, ISAF ground troops ordered all Erusian forces to cease fighting; the war was over.[20]
Despite Erusea's unconditional surrender, a group of young Erusian officers eluded capture and seized control of Megalith, the superweapon whose deployment ISAF was hoping to prevent. As a rocket-launch facility, Megalith was capable of turning near-Earth objects (leftover fragments from Ulysses that still lingered in orbit) into kinetic weapons that could strike the planet's surface and inflict widespread destruction; Megalith would be Erusea's weapon of retaliation. To eliminate this dire threat, ISAF launched a joint operation to infiltrate and destroy the fortified facility from within.[21]
Exactly one week after the war's official end, on September 26, ISAF special forces units inflitrated Megalith while ISAF fighters—newly formed into the 118th Tactical Fighter Wing ("Mobius Squadron")—approached the facility. The Erusians' defense squadron (consisting of 15 rookie pilots) defended Megalith as best they could, but were eventually shot down by the veteran pilots of Mobius Squadron. Mobius 1 then entered the facility to destroy three power generators that were preventing the infiltration team's advance. Once the ground troops gained control of the sub-control room, they opened the panels to the central silo in which a large missile was being stored. Mobius 1 flew into the silo, destroyed the missile—triggering an explosive chain reaction—and escaped unharmed as the facility was destroyed from within.[21]
Operation Katina
After the war's end, steps were taken to form a new, provisional Erusian government and ensure that war would not break out again. However, the provisional government was criticized by militaristic Erusian citizens and officers. In 2006, a large force consisting of Erusian ex-personnel, calling themselves "Free Erusea", seized control of a large munitions factory in the White Valley Bay region and attacked the provisional government and ISAF observers. ISAF responded by launching Mobius 1 into battle once more, who inflicted considerable damage on the Free Erusea forces and quashed the insurrection.[22]
References
- ↑ 1.0 1.1 1.2 Ace Combat 04: Shattered Skies.
- ↑ 2.0 2.1 2.2 2.3 AC04Web
- ↑ Sitting Duck. Ace Combat 04: Shattered Skies.
- ↑ Imminent Threat. Ace Combat 04: Shattered Skies.
- ↑ The Northern Eye. Ace Combat 04: Shattered Skies.
- ↑ Blockade. Ace Combat 04: Shattered Skies.
- ↑ Lifeline. Ace Combat 04: Shattered Skies.
- ↑ Invincible Fleet. Ace Combat 04: Shattered Skies.
- ↑ Deep Strike. Ace Combat 04: Shattered Skies.
- ↑ Shattered Skies (mission). Ace Combat 04: Shattered Skies.
- ↑ Operation Bunker Shot. Ace Combat 04: Shattered Skies.
- ↑ Tango Line. Ace Combat 04: Shattered Skies.
- ↑ 13.0 13.1 Escort. Ace Combat 04: Shattered Skies.
- ↑ 14.0 14.1 Stonehenge Offensive. Ace Combat 04: Shattered Skies.
- ↑ Interlude 07. Ace Combat 04: Shattered Skies.
- ↑ Safe Return. Ace Combat 04: Shattered Skies.
- ↑ Breaking Arrows. Ace Combat 04: Shattered Skies.
- ↑ Emancipation. Ace Combat 04: Shattered Skies.
- ↑ Whiskey Corridor. Ace Combat 04: Shattered Skies.
- ↑ Siege of Farbanti. Ace Combat 04: Shattered Skies.
- ↑ 21.0 21.1 Megalith. Ace Combat 04: Shattered Skies.
- ↑ Arcade Mode. Ace Combat 5: The Unsung War.